
In the world of home cooking, there is a holy grail that every busy individual seeks: the 30-minute meal that tastes like it took three hours. We often find ourselves rotating through the same tired chicken recipes—plain grilled breasts, basic stir-fries, or the occasional store-bought rotisserie. But what if you could elevate your weeknight dinner game with a dish that strikes the perfect balance between sweet, tangy, savory, and crispy?
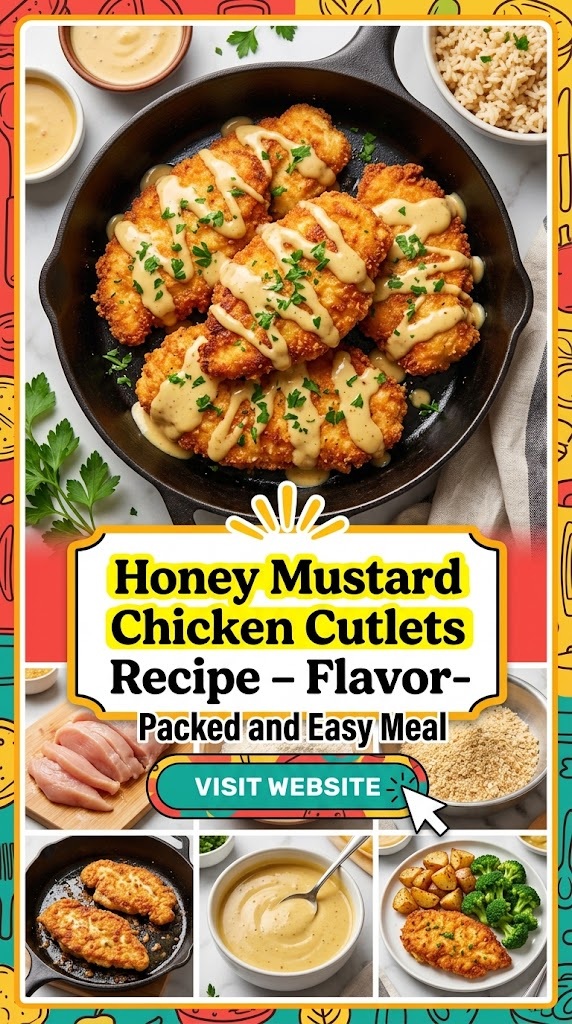
Enter the Honey Mustard Chicken Cutlet. This isn’t just a recipe; it’s a culinary technique that transforms the humble chicken breast into a gourmet experience. Whether you are cooking for a picky toddler, a hungry partner, or hosting a casual dinner party, these cutlets are guaranteed to become a permanent fixture in your kitchen repertoire.
Why the Chicken Cutlet is the King of Weeknight Dinners
Before we dive into the ingredients, let’s discuss the “cutlet” itself. In American kitchens, a cutlet typically refers to a piece of meat (usually chicken, veal, or pork) that has been sliced thin and often pounded out to a uniform thickness.
The beauty of the cutlet lies in its surface area. By thinning the chicken, you create more surface area for seasoning and searing. This serves two purposes:
- Speed: A thin cutlet cooks in a fraction of the time it takes to roast a whole breast. We’re talking three to four minutes per side.
- Texture: Because it cooks quickly at high heat, you achieve a beautiful golden-brown crust while the inside remains incredibly juicy.
When you pair this perfect texture with a homemade honey mustard glaze, you create a flavor profile that hits every taste bud.
The Flavor Profile: The Science of Honey and Mustard
The combination of honey and mustard is a classic for a reason. It is a study in culinary contrast.
- The Honey: It provides the necessary sweetness to balance the acidity of the mustard. As it hits the hot pan, the sugars in the honey undergo caramelization (the Maillard reaction), which creates deep, complex flavors and a sticky, finger-licking glaze.
- The Mustard: Mustard brings the “zing.” Depending on the type you use—be it sharp Dijon, grainy stone-ground, or classic yellow—it provides acidity and spice. Mustard also contains natural emulsifiers that help the sauce cling to the chicken rather than sliding off.
Together, they create a sauce that is bold enough to stand up to the char of the chicken but light enough not to overwhelm the palate.
The Ultimate Honey Mustard Chicken Cutlets Ingredients
To make the best version of this dish, quality matters. Here is what you will need, along with why each ingredient is essential:
The Protein
- 1.5 lbs Boneless, Skinless Chicken Breasts: Look for air-chilled chicken if possible, as it retains less water and sears better.
- Kosher Salt and Freshly Cracked Black Pepper: Essential for building the base layer of flavor.
The Breading/Coating (Optional for Extra Crunch)
- All-Purpose Flour: For a light dredge that helps the sauce stick.
- Optional: Panko Breadcrumbs: If you prefer a “schnitzel-style” crunch, you can add a breading step.
The Honey Mustard Glaze
- 1/4 cup Dijon Mustard: Provides a sophisticated, sharp bite.
- 2 tablespoons Whole Grain Mustard: Adds texture and a rustic look.
- 1/3 cup Raw Honey: For natural sweetness and a thick consistency.
- 2 cloves Garlic, minced: Adds an aromatic depth that prevents the sauce from being one-dimensional.
- 1 tablespoon Apple Cider Vinegar: The secret ingredient. It cuts through the sweetness and brightens the entire dish.
- 1/2 teaspoon Smoked Paprika: Adds a hint of “backyard grill” flavor without needing a BBQ.
For Cooking
- 2 tablespoons Extra Virgin Olive Oil: For searing.
- 1 tablespoon Unsalted Butter: To add richness and help with browning in the final stages.
- Fresh Parsley or Thyme: For a pop of color and herbaceous finish.
Step-by-Step Instructions: Mastering the Technique
Follow these steps carefully to ensure your chicken is moist, crispy, and perfectly glazed every single time.
Step 1: Prep the Chicken (The Most Important Part)
Don’t skip this! Place your chicken breasts on a cutting board. If they are very thick, slice them in half horizontally (butterflying them). Place the pieces between two sheets of plastic wrap or in a heavy-duty gallon bag. Using a meat mallet or a heavy rolling pin, gently pound the chicken until it is about 1/4 to 1/2 inch thick.
Pro-Tip: Pounding the chicken ensures it cooks evenly. You won’t end up with a piece that is burnt on the thin end and raw in the middle.
Step 2: Season and Dredge
Pat the chicken dry with paper towels. Moisture is the enemy of a good sear! Sprinkle both sides generously with salt, pepper, and a little garlic powder if you like. Dredge each piece lightly in flour, shaking off the excess. This thin layer of flour will interact with the oil and honey mustard to create a “velvety” coating.
Step 3: Whisk the Sauce
In a small bowl, combine the Dijon, whole grain mustard, honey, minced garlic, apple cider vinegar, and smoked paprika. Whisk until smooth. Taste it! If you want it sweeter, add a teaspoon more honey. If you want more kick, add a pinch of cayenne pepper.
Step 4: The Sear
Heat a large skillet (cast iron or stainless steel is best) over medium-high heat. Add the olive oil. Once the oil is shimmering (but not smoking), place the chicken cutlets in the pan. Do not crowd the pan; work in batches if necessary.
Cook for 3–4 minutes until a golden-brown crust forms. Flip the chicken.
Step 5: The Glaze
Immediately after flipping, reduce the heat to medium. Pour the honey mustard mixture over the chicken. Add the tablespoon of butter to the pan. As the butter melts, it will combine with the honey mustard to create a glossy, thick sauce.
Using a spoon, “baste” the chicken with the bubbling sauce for another 2–3 minutes. The sauce will thicken and reduce, coating the cutlets in a sticky, golden lacquer.
Step 6: Rest and Serve
Remove the chicken from the pan and let it rest on a plate for 3 minutes. This allows the juices to redistribute. Pour any remaining sauce from the pan over the top. Garnish with fresh parsley.
The Secret to “Google-Ranked” Flavor: Variations and Substitutions
To make this recipe your own—or to adapt to what you have in the pantry—consider these variations:
1. The Creamy Version
If you want a richer, more decadent sauce, stir in 2 tablespoons of heavy cream or Greek yogurt right at the end of the cooking process. This turns the glaze into a creamy honey mustard sauce that is incredible over mashed potatoes.
2. The Spicy Kick
Add a teaspoon of Sriracha or a pinch of crushed red pepper flakes to the honey mustard mixture. The “hot honey” trend works perfectly with chicken cutlets.
3. The Healthy/Paleo Alternative
To make this Paleo or grain-free, swap the all-purpose flour for almond flour or arrowroot powder. Use avocado oil for cooking, as it has a high smoke point and healthy fats.
4. The Air Fryer Method
Want to skip the oil? Coat your seasoned chicken cutlets in the honey mustard mixture first, then press them into panko breadcrumbs. Air fry at 400°F (200°C) for 10–12 minutes, flipping halfway through. It won’t have the same “pan-sauce” feel, but it will be incredibly crunchy.
Perfect Side Dish Pairings
A great main dish deserves companions that complement its flavors. Here are the best sides to serve with Honey Mustard Chicken Cutlets:
The Starches
- Garlic Mashed Potatoes: The creamy texture of the potatoes is the perfect vessel for the extra honey mustard sauce.
- Lemon-Herb Rice Pilaf: The acidity of the lemon cuts through the sweetness of the honey.
- Crispy Smashed Potatoes: For a double-dose of crunch.
The Vegetables
- Roasted Asparagus: Tossed in olive oil and sea salt, asparagus provides an earthy balance to the tangy chicken.
- Honey-Glazed Carrots: If you love the sweetness, lean into it with carrots.
- Garlic Butter Green Beans: A classic pairing that keeps the meal feeling light.
The Salads
- Arugula with Shaved Parmesan: The peppery bite of arugula is a world-class match for honey mustard.
- Cucumber Salad: A vinegar-based cucumber and red onion salad provides a refreshing, cooling contrast to the warm, sticky chicken.
Common Mistakes to Avoid
Even a simple recipe can go wrong if you aren’t careful. Watch out for these common pitfalls:
- Overcrowding the Pan: If you put too many cutlets in the pan at once, the temperature drops, and the chicken will steam instead of sear. You’ll lose that golden crust.
- Burning the Honey: Honey has a high sugar content, which means it can burn quickly. Once you add the sauce to the pan, keep a close eye on the heat. If it starts to smell like it’s scorching, turn the heat down or add a splash of water/chicken broth to thin it out.
- Not Pounding the Chicken: We mentioned it before, but it’s worth repeating. Uneven chicken leads to some parts being dry and stringy while others are undercooked.
- Using Only Yellow Mustard: While yellow mustard is fine in a pinch, it lacks the depth of flavor found in Dijon. Try to use at least a mix of the two for a better culinary result.
Nutritional Benefits of This Recipe
While “honey mustard” might sound indulgent, this dish is actually quite healthy when prepared at home.
- High Protein: Chicken breast is one of the leanest sources of high-quality protein, essential for muscle repair and satiety.
- Mustard Benefits: Mustard seeds contain antioxidants and anti-inflammatory compounds like glucosinolates.
- Raw Honey: If you use raw honey, you get the benefits of enzymes and antioxidants that are often processed out of “clover honey” bears found in grocery stores.
- Controlled Ingredients: By making your own sauce, you avoid the high-fructose corn syrup and preservatives found in bottled honey mustard dressings.
Meal Prep and Storage Tips
This recipe is a meal prepper’s dream. The chicken stays moist even after reheating, making it a great option for office lunches.
- Fridge: Store cooked cutlets in an airtight container for up to 4 days.
- Freezer: You can freeze the cooked cutlets. To reheat, place them in an oven or air fryer at 350°F until warmed through to maintain the texture.
- Reheating: Avoid the microwave if possible, as it can make the chicken rubbery. A quick flash in a pan with a drop of water or in the toaster oven works best.
Frequently Asked Questions (FAQ)
Can I use chicken thighs instead of breasts?
Absolutely. Chicken thighs are more forgiving and stay juicier due to their higher fat content. However, they take slightly longer to cook. Ensure you use boneless, skinless thighs and pound them slightly so they are even.
Is this recipe gluten-free?
As written with all-purpose flour, it is not. However, you can simply omit the flour dredge or use a 1-to-1 gluten-free flour substitute to make it safe for those with celiac disease or gluten sensitivity.
How do I know when the chicken is done?
The safest way is to use an instant-read meat thermometer. Chicken is done when it reaches an internal temperature of 165°F (74°C). Because cutlets are thin, they usually reach this temperature right as the outside becomes golden.
Can I make the sauce ahead of time?
Yes! You can whisk the honey mustard sauce ingredients together and store them in a jar in the fridge for up to two weeks. This makes the actual cooking process even faster.
Bringing it All Together
Cooking shouldn’t be a chore, and it shouldn’t require a culinary degree to taste amazing. This Honey Mustard Chicken Cutlets recipe represents the best of home cooking: it’s fast, accessible, and bursting with flavor.
By mastering the simple art of the cutlet—pounding the meat, searing it properly, and finishing with a balanced glaze—you unlock a world of possibilities. This dish is more than just a meal; it’s a reliable “win” in the kitchen.
The next time you’re staring at a package of chicken breasts wondering what to do, remember the golden rule of flavor: Sweet, Tangy, and Crispy. Grab the honey, grab the mustard, and get that skillet hot. Your family (and your taste buds) will thank you.
Kitchen Tools You May Need
To achieve professional results, having the right tools makes a significant difference:
- Meat Mallet: For even pounding.
- Cast Iron Skillet: For the ultimate sear and heat retention.
- Whisk: To ensure the honey and mustard are fully emulsified.
- Tongs: For easy flipping without piercing the meat and losing juices.
- Instant-Read Thermometer: To guarantee juicy, safe chicken every time.
Summary Checklist for Success
- Prep: Pound chicken to 1/2 inch.
- Dry: Pat the meat dry before seasoning.
- Mix: Whisk the sauce before you start the stove.
- Sear: Use medium-high heat for a good crust.
- Glaze: Lower the heat when adding the honey to avoid burning.
- Rest: Give the meat a few minutes before slicing.
Enjoy your culinary journey with this flavor-packed, easy-to-master meal! Whether it’s a Tuesday night or a Sunday family dinner, these Honey Mustard Chicken Cutlets are sure to shine.