
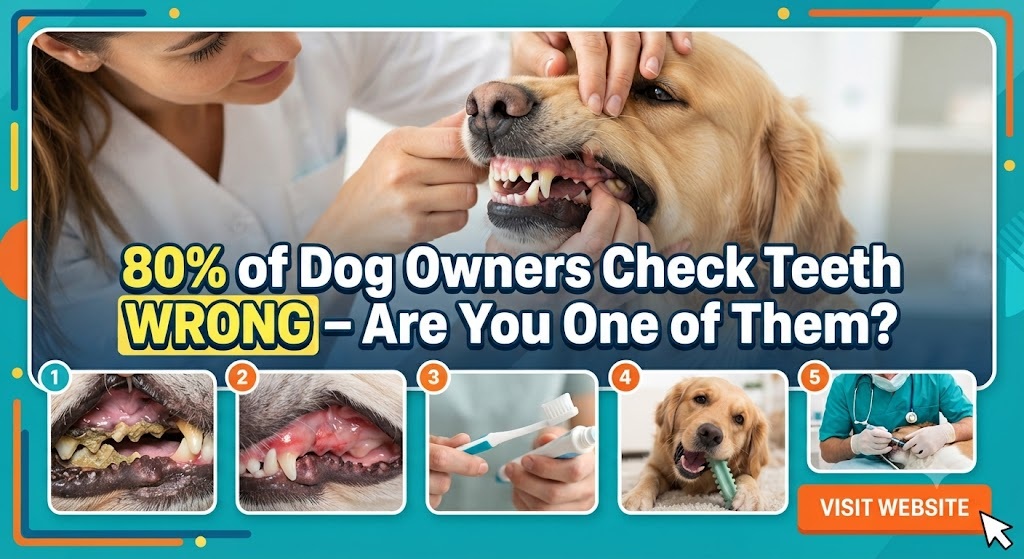
How to Check Your Dog’s Teeth: 80% of Owners Do It Wrong (And How to Do It Right)
Did you know that by the age of three, approximately 80% of dogs show signs of some form of periodontal disease? Even more shocking is that despite our deep love for our canine companions, 80% of dog owners are performing dental checks incorrectly or neglecting them altogether.
We often joke about “dog breath,” but the reality is far from funny. Chronic oral pain is one of the most underdiagnosed conditions in veterinary medicine because dogs are masters at hiding discomfort. In the wild, showing pain is a sign of weakness; in your living room, it means your dog is suffering in silence while their teeth slowly decay.
In this comprehensive guide, we will break down why most owners fail at dental checks, how to perform a professional-level inspection at home, and the life-saving reasons why oral health is the gateway to your dog’s overall longevity.
The Silent Epidemic: Why “Dog Breath” Isn’t Normal
The biggest mistake owners make is assuming that a foul odor coming from their dog’s mouth is simply part of being a dog. It isn’t. A healthy dog’s mouth should not have a pungent, rotting, or “fishy” smell.
When you ignore your dog’s oral health, you aren’t just risking a few lost teeth. You are inviting a systemic health crisis. Bacteria from the mouth don’t stay in the mouth. They enter the bloodstream through inflamed gums (gingivitis) and travel directly to the major organs.
The Heart, Liver, and Kidney Connection
Scientific studies have consistently linked periodontal disease in dogs to:
- Endocarditis: Inflammation and infection of the heart valves.
- Kidney Failure: Chronic filtration of bacteria-laden blood takes a heavy toll on renal function.
- Liver Disease: The liver acts as a filter, and constant bacterial bombardment leads to chronic inflammation and scarring.
Checking your dog’s teeth isn’t about a “pearly white smile”; it’s about adding years to their life.
Why 80% of Owners Are Doing It Wrong
Before we get into the how, let’s look at the why. Why are most owners failing their dogs during home exams?
1. The “Front-Tooth Only” Fallacy
Most owners lift the front of the dog’s lips (the flews) and look at the incisors. If the front teeth look white, they assume everything is fine. This is a critical error. The most severe dental disease usually hides in the back of the mouth, specifically on the upper fourth premolars (the carnassial teeth) and the molars.
2. Ignoring the Gum Line
Owners often focus on the color of the teeth. While yellow or brown tartar is a sign of trouble, the real danger lies at the gum line. A tooth can be relatively white but have deep “pockets” of infection under the gum where you can’t see it.
3. Missing the “Inside” View
Many owners never check the inside surfaces of the teeth (the lingual side). While plaque builds up more heavily on the outside (buccal side), tumors and lesions often hide under the tongue or on the palate.
4. Forcing the Interaction
If you force your dog’s mouth open, they will develop a negative association with the process. Eventually, they will struggle, snap, or hide, leading the owner to give up entirely.
The Step-by-Step Guide to a Professional Home Dental Check
To check your dog’s teeth correctly, you need a systematic approach. Do not rush. If your dog is not used to having their mouth touched, spend a week just massaging their muzzles before attempting a full exam.
Step 1: Set the Environment
Choose a quiet, well-lit area. If you have a small dog, place them on a table or counter (with a non-slip mat) to bring them to eye level. For large dogs, sit on the floor with them. Have high-value treats ready to reward them for their cooperation.
Step 2: The Smell Test
Before you even open their mouth, get close. A slight “doggy” smell is okay, but a “garbage,” “rotting meat,” or “sweet/fruity” smell is a red flag.
- Rotting smell: Indicates infection or decaying tissue.
- Sweet/Fruity smell: Can actually be a sign of diabetes.
- Urine-like smell: Can indicate kidney issues.
Step 3: The “Lip Flip” (Outer Surfaces)
Gently lift the upper lip on one side. Use your thumb to slide the lip upward.
- Look at the canines: These are the long “fang” teeth. Check for chips at the tips.
- Slide back to the Carnassials: Pull the corner of the mouth back toward the ear. This is where the heavy lifting happens. You are looking for the large, multi-rooted tooth at the back. This is the most common site for “slab fractures” (chips caused by chewing hard objects).
Step 4: The Gum Inspection
Healthy gums should be a healthy “bubblegum” pink.
- Redness: If there is a thin red line where the tooth meets the gum, that is Stage 1 Gingivitis.
- Recession: If the gum is pulling away, exposing the root, the disease is advanced.
- Pigmentation: Note that some dogs (like Chows or Labradors) have black spots on their gums. This is normal, but any new or raised black spots should be checked by a vet.
Step 5: Checking for Stability
Using a gloved finger (or very clean hands), gently apply pressure to the larger teeth. They should be rock solid. If a tooth wiggles even slightly, it is a sign of bone loss in the jaw and requires immediate veterinary attention.
Step 6: The “Inside” and Palate (The Hard Part)
Gently place your hand over the bridge of the nose and use your thumb and forefinger to encourage the mouth to open.
- The Palate: Look at the roof of the mouth. Check for embedded hair, sticks, or any abnormal growths.
- Under the Tongue: This is a common spot for oral squamous cell carcinoma (cancer). Ensure there are no lumps or ulcers hiding under there.
The Red Flags: What Exactly Are You Looking For?
When performing your check, keep an eye out for these specific clinical signs of dental distress:
1. Tartar vs. Plaque
Plaque is a soft, sticky film of bacteria that forms within hours of eating. It can be brushed away. Tartar (calculus) is what happens when plaque mineralizes. It is hard, brown or yellow, and cannot be brushed off. If you see tartar, your dog needs a professional cleaning.
2. Bleeding Gums
Gums should never bleed during a check or while the dog is chewing a toy. Bleeding is a sign of active infection and tissue breakdown.
3. Hyperplasia (Overgrown Gums)
In some breeds (like Boxers or Bulldogs), the gums can grow over the teeth. This creates deep pockets that trap food and bacteria, leading to massive infections.
4. Broken or Discolored Teeth
A purple, grey, or pink tooth is a “dead” tooth. It means the pulp (the nerve) has been traumatized. These are often extremely painful, even if the dog doesn’t cry out.
The Anatomy of the Canine Mouth
Understanding what should be there helps you spot what shouldn’t be.
- Puppies: Have 28 deciduous (baby) teeth. They are razor-sharp and should all fall out by 6 months of age.
- Adults: Most adult dogs have 42 teeth.
- Incisors (12): Used for grooming and nibbling.
- Canines (4): Used for grasping and tearing.
- Premolars (16): Used for shearing.
- Molars (10): Used for grinding.
The “Retained Deciduous Tooth” Problem: In small breeds (Yorkies, Chihuahuas), baby teeth often don’t fall out when the adult teeth come in. This creates a “crowding” effect where food gets trapped. If you see two teeth in one spot (the “shark tooth” look), that baby tooth needs to be surgically removed.
Preventive Care: How to Move from the 80% to the 20%
If your check-up reveals a healthy mouth, your goal is maintenance. If it reveals mild issues, you need to step up your game.
1. Brushing: The Gold Standard
Nothing replaces mechanical brushing.
- Frequency: Daily is best, but 3 times a week is the minimum for clinical effectiveness.
- The Paste: Never use human toothpaste. It contains Xylitol (toxic to dogs) and fluoride (toxic in high doses). Use poultry or malt-flavored enzymatic dog toothpaste.
- The Technique: You don’t need to brush the inside of the teeth (the dog’s tongue does a decent job there). Focus on the outside surfaces where the salivary glands are.
2. The Power of “VOHC”
When buying dental chews, water additives, or specialized diets, look for the VOHC (Veterinary Oral Health Council) Seal of Acceptance. This seal means the product has been scientifically proven to reduce plaque and tartar. Most “dental treats” on the supermarket shelf are nothing more than glorified biscuits.
3. Diet and Chew Toys
- Rawhide: Be cautious; it can be a choking hazard and is often treated with chemicals.
- Rubber Toys: Kongs and similar toys are great for “massaging” the gums.
- The “Kneecap” Test: If you hit a chew toy against your knee and it hurts, it’s too hard for your dog’s teeth. Antlers, hooves, and nylon bones are leading causes of fractured teeth.
When to Call the Professional
A home exam is a screening tool, not a cure. If you notice any of the following, you must schedule a veterinary dental appointment:
- Facial Swelling: Specifically under the eye. This often indicates a tooth root abscess.
- Dropping Food: If your dog is a “messy eater” all of a sudden, they may be trying to avoid chewing on one side.
- Blood on Chew Toys: A clear sign of advanced gingivitis.
- Pawing at the Face: Often mistaken for allergies, this can be a sign of dental pain.
- Shying Away from Head Pets: If your dog suddenly dislikes being touched on the head, their mouth might be throbbing.
The Truth About “Anesthesia-Free” Cleaning
You may see “Anesthesia-Free Dental Cleaning” offered at groomers or some pet boutiques. Avoid these.
Veterinary dental societies strongly discourage this practice for several reasons:
- It’s Cosmetic Only: They scrape the tartar off the crown so the teeth look white, but they cannot get under the gum line where the actual disease lives.
- It’s Stressful: Forcing a dog to stay still while sharp metal instruments are used in their mouth is terrifying and dangerous.
- Missing the Problem: Without X-rays (which require anesthesia), 60% of dental pathology is missed.
A real dental cleaning involves scaling, polishing, and most importantly, subgingival (under the gum) cleaning and X-rays while the dog is safely anesthetized and monitored.
A Training Plan for Mouth-Shy Dogs
If your dog is part of the 80% of dogs that won’t let you near their mouth, follow this 4-week desensitization plan:
Week 1: The “Muzzle Massage”
During snuggle time, gently rub your dog’s cheeks and muzzle. Don’t try to lift the lips. Just get them used to your hands being near their mouth. Reward with a treat after every session.
Week 2: The “Taste Test”
Put a dab of dog-safe toothpaste on your finger. Let the dog lick it off. Do this for 7 days. You want them to think of the toothpaste as a treat.
Week 3: The “Lip Lift”
Gently lift the lip for one second, touch a tooth with your finger, and immediately give a treat. Repeat this daily, gradually increasing the time you hold the lip up.
Week 4: The Introduction of the Brush
Use a finger brush or a soft toddler toothbrush. Start with just the canines (the big ones in front). As they become comfortable, work your way back to the molars.
The Longevity Dividend
We all want our dogs to live forever. While we can’t grant immortality, we can control the factors that shorten their lives. Dental health is one of the most controllable variables in canine longevity.
By performing a proper dental check once a week—looking past the incisors, checking the gum color, and smelling the breath—you are performing an act of love that far outweighs any belly rub or treat.
Don’t be part of the 80% who do it wrong. Start your first correct dental exam today. Your dog’s heart, kidneys, and liver will thank you for it, and you’ll enjoy many more years of those sloppy, (now) fresh-smelling kisses.
Summary Checklist for a 5-Minute Dental Exam
- Step 1: Smell the breath (No rotting odors).
- Step 2: Check the incisors (Front teeth) for alignment.
- Step 3: Perform the “Deep Lip Flip” to see the back molars.
- Step 4: Inspect the gum line (Look for the “Red Line” of gingivitis).
- Step 5: Look for brown/yellow tartar buildup.
- Step 6: Gently check for loose teeth.
- Step 7: Inspect the tongue and palate for lumps or strange colors.
- Step 8: Reward your dog for being a good patient!
Pro Tip: Take a photo of your dog’s teeth with your smartphone every month. This allows you to track changes over time and gives you something to show your vet if you’re concerned about a specific spot!